


Simple Drywall Repair for Homeowners
Drywall repair might seem like it’s just for the professionals. However, if you have several screw holes down your wall or one larger hole from an unfortunate incident, patching them up is a simple job. Follow along as we go through common drywall holes and their fixes, covering everything from corner beads to feathering out joint compound.
What is Drywall?
Drywall is made of gypsum or calcium sulfate, a naturally occurring mineral that is mined in many countries throughout the world. The gypsum is ground into a powder, dried, and then turned into a type of plaster sandwiched between two layers of paper. It comes in several different types including regular for your bedroom walls, type X or even C for fire-resistance (often used in garages), and mold- or moisture-resistant options for basements or damp climates. While drywall provides the structure for your walls and can hold quite a bit of weight like a large picture frame, it can also bust and crack if a large enough force pushes or pulls too hard.
Drywall also comes in several standard thicknesses including 1/4-inch, 1/2-inch, and 5/8-inch. 1/2-inch panels are the typical sizes for most bedrooms. The smaller 1/4-inch is for special cases where an installer is adding on or bending it. 5/8-inch is for ceilings or fire-ratings. It's hung with long drywall screws held by the studs of your framing. The seams between each panel are coated with a joint compound or “mud” and sealed with tape to create a strong and smooth finish and flat surface for paint or other decorative finishes.
How to Repair Drywall
Repairing is a simple job that requires only a few tools and materials depending on the size of the hole:
- Spackle (for small holes)
- Joint Compound (for big holes)
- Drywall Repair Patch or Drywall Tape
- Drywall Taping Kit
- Sandpaper
- Corner Bead (if needed) and nails/screws
- Drywall repair clips (if needed)
- Utility Knife
- Hack Saw
Small Nail Hole or Popped Nails
For a small nail hole, a few coats of spackle will do the job. Spackle provides a similar seal on the hole to a joint compound but has a thicker consistency and is easier to work with. This is great for small holes because spackle doesn’t shrink like joint compound and a small amount can be used.
Typically, any type of spackle will work for small holes. Use a utility knife to cut away any jagged pieces of the panel to make the edges of the hole smooth. Apply a small amount of spackle over the hole with a taping knife. Allow to dry per package instructions then add additional coats as needed to completely fill the hole. When dry, smooth the spackle with drywall sandpaper and paint or otherwise finish the wall. Follow this same process to fill minor cracks. However, if you’ve got some larger cracks, check for foundation problems—cracked drywall may be a symptom.
In older homes, drywall may be attached with nails, which tend to pop out. When this happens, it needs to be secured and smoothed down to a flat wall again. To fix this, carefully hammer the nail back in and use one or two screws to secure the board back to the stud. For the typical 1/2-inch panel, use 1 1/4-inch or 1 5/8-inch drywall screws. Then, fill in the holes with spackle as above, then sand and finish.
Medium-Sized Holes
For any hole bigger than a nail head but less than six inches, you’ll need something more than spackle to cover the hole. Here’s where a heavy duty joint compound and tape or a repair patch come into play.
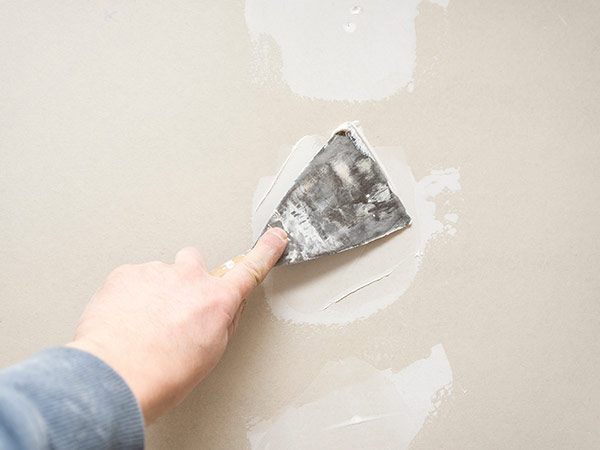
First, place the patch over the hole (they usually have a sticky backing to adhere to the wall). If you are using drywall tape, apply a thin coat of spackle or joint compound around the edges of the hole and smooth on the tape. Next, paste over the patch or tape with spackle or joint compound using your taping knife. You may have to do two or three coats to make sure everything is covered up. Around the edges of the spackle or joint compound, use what’s called the “feather” method to blend the compound or spackle into the wall seamlessly. Use your drywall knife to smooth the compound out to avoid any seams. Sand and apply your finish.
Large Holes
Large holes require a bit more care to cover up. For holes six inches or more you’ll need some spare drywall. First, cut around the damaged area to make an even square or rectangular opening. Then, on your spare drywall, cut the same shape only slightly smaller than the one in the wall. Place the new drywall in the wall to ensure a good fit- not too tight, not too loose.
Note: If the damage is extensive, it’s best to get a professional opinion before making any repairs. If the damage is on fire-rated drywall, make sure your new drywall is of the same type.
Next, you will need something to fasten the new drywall to. Drywall repair clips or a small piece of 2x4 board can be used. The clips don’t require any extra screws in the wall, but their metal ends will need to be gently hammered down for a smooth finish. The new drywall will sit into the wall and the clips will support it from falling into the space between the studs.
If you’re using a wood support, put the piece(s) behind the drywall in the opening and screw down using four drywall screws. This will be the backing for the new drywall to keep it from falling inside the wall. Next, place the new drywall into the hole and screw down into the wood backings using two drywall screws. After installation using the wood or clips, “float” or install drywall tape around the seams using an all-purpose joint compound or a quick-setting option (underneath and on top of the tape). Sand and finish.
Another way to patch up larger holes is to cut your new drywall like the above method but leave two or three inches of the front-facing paper exposed all around the gypsum interior of the drywall patch. The gypsum middle will be flush with the wall but the paper on the front acts like the tape. Use joint compound and apply as normal. When everything is dry and smooth, sand and paint.
Corners
Wall corners can get damaged easily as a quick bump while moving furniture is enough to cause a dent. The corners on walls are initially installed with corner beads on the drywall seams, usually made of metal or some other harder material than the drywall tape for seams. The first step is to cut out the damaged section of the corner bead with a hack saw and remove it by prying loose the nails or screws. You will then need to cut a section of the same size from a new corner bead and install the bead with nails for a flush head with the corner. Use several layers of joint compound over the corner bead making sure to form it into a right angle. When dry, sand and finish.
Drywall Repair at McCoy's
We are your one-stop shop for repairing damaged drywall. Whether you need to pop in for some spackle or help in determining what type of drywall you need or even applying joint compound tips, we are ready to help you. With our buy online and pickup in-store option you can save precious repair time by placing your order online. We’ll let you know when you can swing by and pick it up (we’ll even load it for you).