
McCoy's Kid Project: DIY Christmas Ornaments
Homemade wooden Christmas tree ornaments made by McCoy’s kids are the perfect addition to your family Christmas tree or as gifts for grandparents and friends. This is a simple and fun Christmas project for any McCoy’s kid to create with easy-to-get supplies. Follow these steps to make unique wood ornaments for a fun-filled Christmas craft day that will bring back memories year after year. Let’s get to it!
Planning Your Ornaments
This is a simple project that doesn’t require a lot of supplies; however, a flat workspace will be necessary, so you have room to paint. Whether you’re working on a table or the floor, think about putting a drop cloth, newspaper, or an old towel under your workstation so you don’t get paint splatters on something you want to keep clean.
Get Creating
Step 1: Gathering Supplies
If you are an avid DIYer, you might have some scrap wood pieces or end pieces of wood laying around and some paint and extra paint brushes. After all, it’s a shame to waste potential project supplies. However, you and your McCoy's kid can head over to your local McCoy’s for some small wood pieces and other painting materials if they’re needed.
The shape of the wood piece doesn't matter as these ornaments are supposed to be unique. For our ornaments, we chose a variety of different shapes like a cylinder, rectangles, and a base trim block that gave a unique shape. Having lots of different shape options can spark creativity.
Other items you will need include paint, different sized paint brushes for large and small details, screw eyes, string, sandpaper to sand away rough patches, a painter’s palette or paper plate, and a hammer or drill. The sky’s the limit with other items you might want to include on your ornaments, such as glitter, googly eyes, twine, yarn, or ribbon.
Step 2: Getting Ready to Paint

If you have some wood pieces with rough parts, smooth It out with fine grit sandpaper. Now is also the time to lay down a drop cloth under your workstation to avoid paint mishaps and to make the clean-up process go faster. You can also lay out all your supplies so they will be ready to go.
Before you start to paint, think about your design. Do you have a triangular wood piece? Paint a Christmas tree to fit the shape! A circle piece of wood? Snowflake! Rectangles? Reindeer! However, sometimes the most creative designs come from playing with paint and color.
No matter the design, having the paint colors you want ready on a painter’s palette or paper plate will help the process go smoothly. Be sure to close the lid on the paints when they are not being used to keep them from drying out.

Step 3: Painting Your Ornament
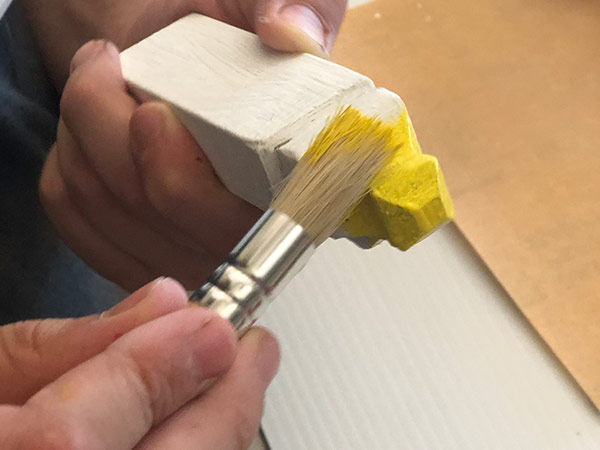
Give everyone a paintbrush and get started. To avoid smears and smudges, let the paint dry before moving on to a new color. Once all your ornaments are painted, let them dry for at least an hour before moving on to the next step.
![]() You can use painter's tape to easily paint crisp lines on your ornament.
You can use painter's tape to easily paint crisp lines on your ornament.

Add some flair such as googly eyes and a plaid scarf for your snowman or a glitter star for your tree, for example.

Step 4: Hanging Your Ornament
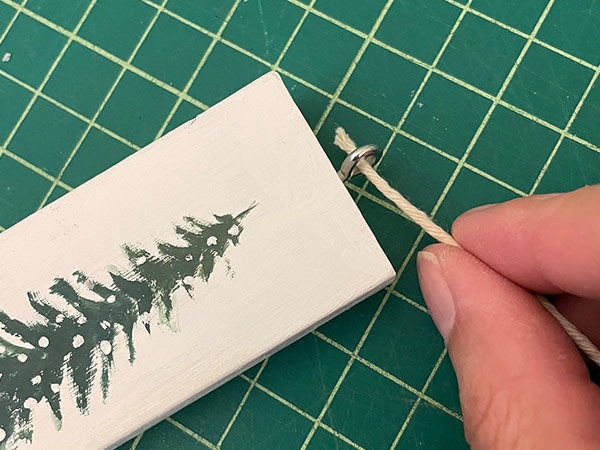
A screw eye is an easy way to make a hanger for your ornament. (Mom or Dad may want to help here). Insert the screw eye at the top of your ornament by hammering it in slightly or a drill and drill bit to make a guide hole before inserting the screw eye and twisting it into place. Using your choice of string, thread it through the eye hook and tie a knot at the end of the string leaving a loop in the middle.
Now you are ready to hang your new ornament or wrap it up as a gift to share the holiday spirit! If you are keeping your DIY ornament, find a good spot on your tree and let it add more joy to your holiday. A hand painted DIY Christmas Ornament is sure to become a treasured memory. Head to your local McCoy’s for supplies and inspiration for projects big and small.
- Wood Dowels/Plugs
- Painter's Tape
- Screw Eyes
- Sandpaper
- Painter's Pallet or Paper Plate
- String/Rope/Twine
- Drop Cloth
- Wood Dowels/Plugs
- Painter's Tape
- Screw Eyes
- Sandpaper
- Painter's Pallet or Paper Plate
- String/Rope/Twine
- Drop Cloth

