
McCoy’s Kid Project: DIY Decor Holiday Blocks
Holiday decor blocks are easy and fun for the whole family, made even better with supplies you have hanging around your house. Follow along with these simple steps to create your own DIY holiday decor blocks that are sure to brighten up any holiday or create blocks with a message or imagery to make any day a celebration. Let’s begin!
DIY Holiday Decor Project Planning
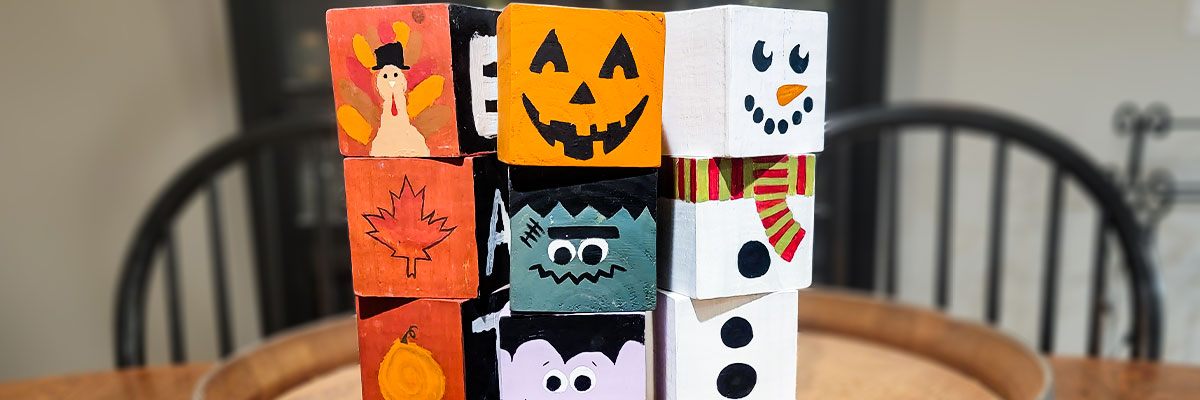
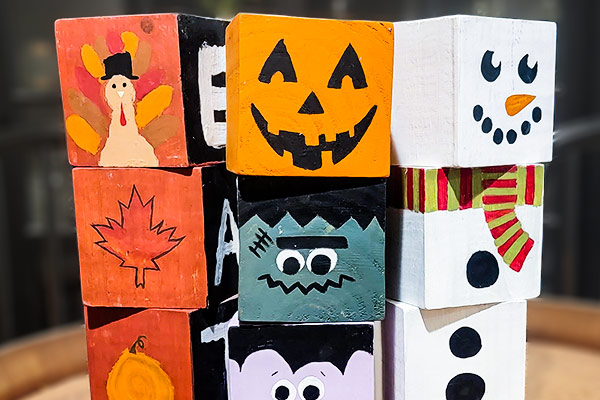
Planning where you're going to put your holiday decor blocks is the first crucial step. Will you put them on the mantle? Or will you display them on your coffee table? Or maybe a porch railing? For this project we used three 4x4x8 wooden cubes, stacked. We wanted something that was not too big or too small for wherever you decide to place your holiday blocks. But, feel free to customize them even further with different size blocks in your stacks, incorporate designs unique to your family, or even a second column of blocks.
Before you start painting, it's important to have a good working station. Make sure you have an old tablecloth or drop cloth so that you don’t spill any paint on your table.
First, brainstorm your ideas then plan out what you want. Do you want one design on one side with the rest solid? Or two or more designs for a single holiday or multiple holidays? It’s always best to start with a plan.
Project Steps for Your DIY Holiday Decor
Step 1: Gather Your Supplies
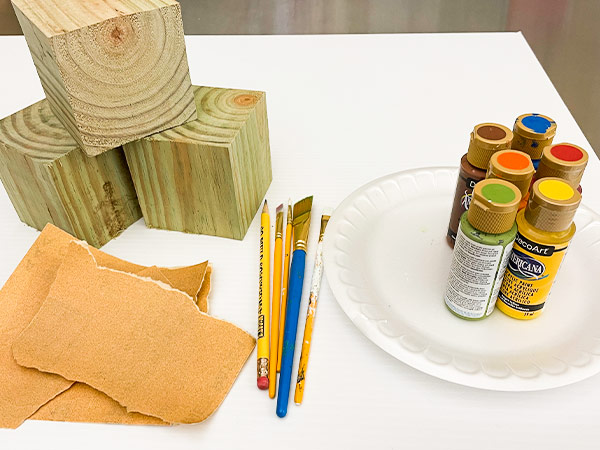
If you’re an avid DIYer, you might have some leftover wood scraps that have been laying around in your garage or in your storage shed. If not, you can use a 4x4x8 treated post cut into cubes. With this project you are also going to need:
- Medium grit sandpaper
- Acrylic paint
- Paint brush
- Pencil
- Painter's tape
- Polyurethane spray
Step 2: Sanding Your Blocks
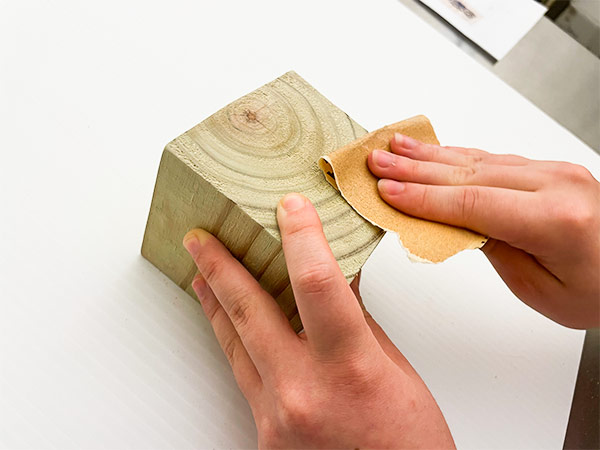
Once you have gathered all the supplies needed for your project it is time to start sanding your blocks. If you have wood that has any rough surfaces, you can use a medium grit sandpaper to smooth out your painting surface. If you have any kids that are older than the age of eight, then this is a simple step with guidance from any adult. It would be best to take this step outside so you will not have little pieces of wood flying all over the place.
Once you have finished sanding your blocks, grab a wet rag and wipe them down to get rid of any dust so you have a clean painting surface. Once the blocks are dry you will be ready for the next step. This is the most fun part of this project: painting!
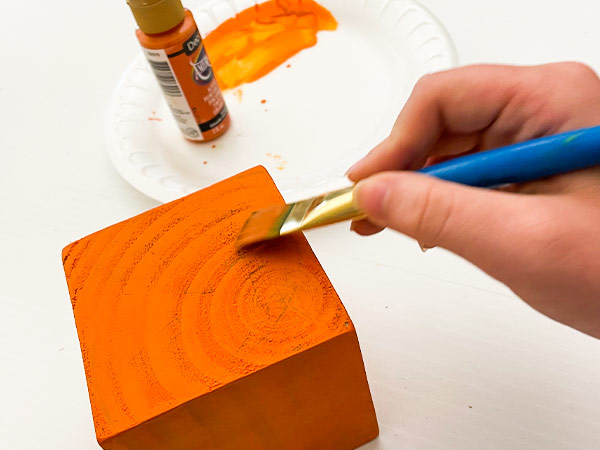
Step 3: Painting Your Holiday Blocks
Once everyone has a paintbrush, you're ready to paint. Before you begin, organize your paints in the order you’ll be using them. Also make sure your tablecloth or drop cloth is down so you can avoid getting any unwanted paint on your table top.
You can even paint the block a solid color, then cut painter’s tape into your desired shape. Allow the block to dry. Apply the tape, then paint over the block a darker color. Remove the tape when the block is dry.
For our holiday decor blocks we painted a Jack-O-Lantern face, a Frankenstein head, and a monster face for some spooky decor. We first outlined our pumpkin head and our Frankenstein and monster faces with a pencil on the blocks so that we could use it as a guide for when we painted over it. Then we painted the space around the design on our blocks very carefully so that we didn’t completely cover our outline. Once the paint dried, we painted within our outline and added the word "BOO" to the back of our blocks.
You don’t just have to stick with Halloween fun! If you’re feeling hungry because you can’t wait for Thanksgiving, paint a turkey. Or maybe you’re feeling patriotic and want to paint the American flag. These are just some of the few ideas that we used for our other holiday decor blocks, but don’t be afraid to think outside the box and paint something that goes with your home’s unique style.
Step 4: Sealing Your Blocks
The final step is sealing your blocks so they will last for years!
When sealing your blocks make sure you do this outside, and that an adult is supervising. It is recommended, but not required, that you spray your holiday blocks with Polyurethane spray to keep your blocks in the best shape so you can enjoy them for many holidays to come. Once you’ve finished sealing your blocks, let them dry completely and then your hard work is ready to be displayed for some holiday fun.
Need some help getting started? Head over to your local McCoy’s and we’d love to chat about materials and ideas with you. Be sure to check out our other McCoy’s Kid unique projects.
P.S. They’re great for Born-to-Build adults, too.