


Basic Smoke Alarm Installation
Installing a smoke alarm (or many throughout your home) is important in keeping your family safe. This is a project for an experienced DIYer, so if you feel unsure about any of these steps, please consult an electrician. For more information on types of smoke alarms and placement in your home, check out this article.
If your smoke alarm is solely battery operated, installation doesn’t require electrical work. Here are some quick steps:
- Drill holes in the ceiling or wall where you will place the alarm and where the mounting bracket will be secured.
- Install the screw anchors for extra hold.
- Attach the mounting bracket to the screw anchors.
- Make sure the alarm has batteries and attach the alarm to the mounting bracket.
Basic Hardwired Alarm Installation Steps:
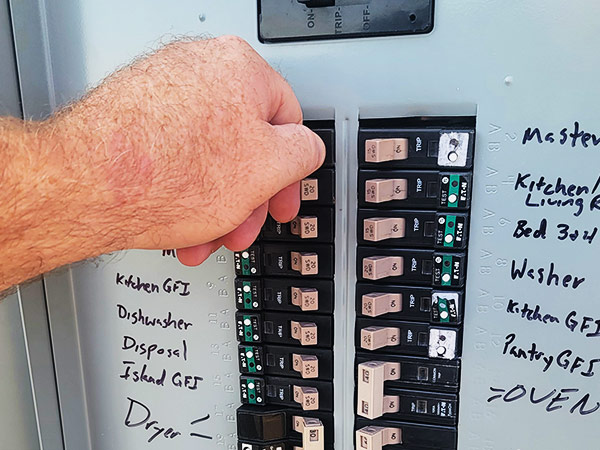
- Turn off the home’s power completely.
- Determine installation locations and use the smoke alarm’s electrical box (also called a “remodeling box”) as a template to trace a spot on a ceiling joist for secure installation.
- With a drill, make a pilot hole in the middle of the electrical box outline, then cut out the box closely using the saw.
- Starting at the power source (a wall outlet, wall switch, or circuit breaker), you’ll run a wire with ground to the detector site.
- With each subsequent detector, you’ll run a 3-wire cable between each detector box. You should have 8-10 inches of wire hanging from each alarm location.
- Use a cable stripper to remove the outer insulation from about ¾-inch of the exposed wire.
- Insert the wires through the back of the electrical box and insert it into the space you sawed out of the ceiling drywall.
- Attach the copper ground wires to the box according to the manufacturer’s directions.
- Connect like color wires using wire nuts of the same color.
- Connect smoke alarms to each other so that each set of wires running from the power source (the 2-strand wire) is connected. Wrap connectors with electrical tape.
- Tuck up the excess wire and wire connectors into the electrical box.
- Follow manufacturer’s instructions to install the appropriate back-up battery to each smoke detector and then attach the detector securely to the electrical box in the ceiling.
- Do a final connection of the cable to the breaker box or power source with the help of a certified electrician who can ensure the system is properly installed before powering up.
- Test each detector using the “test” buttons.
If you have any questions on how to begin or the materials you will need, stop by your local McCoy’s where we are ready to help you in keeping your family safe.